
How to Add Your Business to Yelp (Step-by-Step Guide)
In this guide
When it comes to local search and customer reviews, Yelp is a heavyweight champion. While it’s incredibly popular for restaurants and hospitality, it is equally vital for service-based businesses, retailers, and tradespeople across the UK.
Creating or claiming a free Yelp listing does more than just give your customers a place to leave a 5-star review. It builds a high-authority local citation that Google loves, and perhaps most importantly, Yelp data heavily feeds into Apple Maps. If you want iPhone users to find your business easily, a Yelp profile is non-negotiable!
One unique thing about Yelp is that anyone—even your customers—can add a business to the platform. Because of this, your first step will be making sure a listing doesn't already exist for you to claim.
Don't worry if this sounds complicated. Taking control of your Yelp presence is completely free and easy to do. Grab a cup of tea, and let's walk through how to add or claim your business on Yelp step-by-step.
Navigate to Yelp for Business
Because Yelp allows anyone—including customers—to create a page for a business they’ve visited, your first step is actually a search. You need to check if a listing already exists for your business so you can claim it, rather than creating a duplicate (which can harm your local SEO).
Here is how to get to the right starting point:
- Open your web browser and go to https://www.yelp.co.uk/.
- Look at the top right-hand corner of the homepage and click on the drop-down menu labeled "Yelp For Business".
- From that drop-down list, click on the option that says "Add a Business".
- This will take you directly to a new page with a form titled "Let’s look up your business."

Check for an Existing Yelp Listing
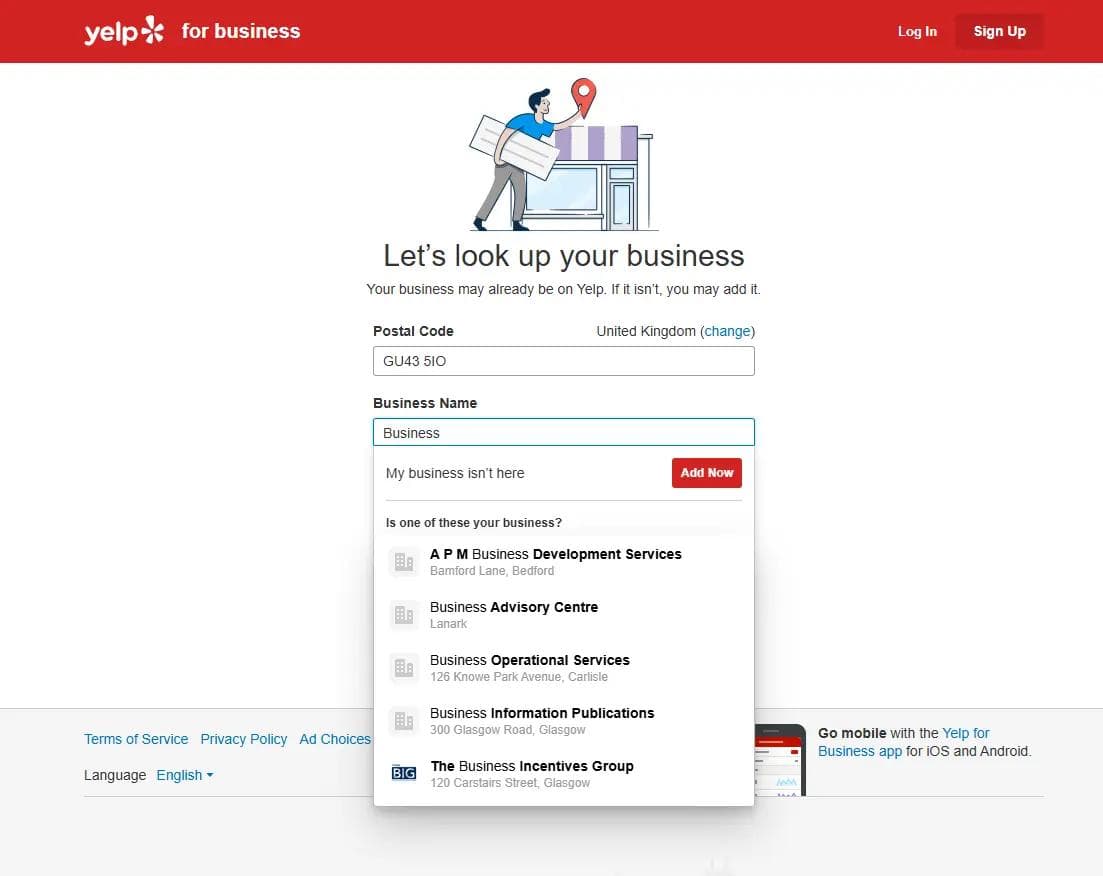
Now that you are on the "Let’s look up your business" page, it's time to see if Yelp already has a basic profile for you on their system.
- In the first box, type in your official Business Name. Make sure to spell it exactly as it appears on your website and other online directories (remember, consistency is key for local SEO!).
- In the second box, enter your business Postcode.
- Click the search button to see the results.
What happens next? Yelp will scan its database and present you with a list of potential matches. You will encounter one of two scenarios here:
- Your business appears in the list: Great! This means a customer or data aggregator has already created a basic placeholder profile for you. Simply click on your business name, and Yelp will guide you through the steps to "Claim" it as the rightful owner.
- Your business does not appear: If the search comes back empty, or the results only show unrelated businesses, you will see a red button that says "Add Now". Click this to start building your brand new profile from scratch.
Enter Your Core Business Details
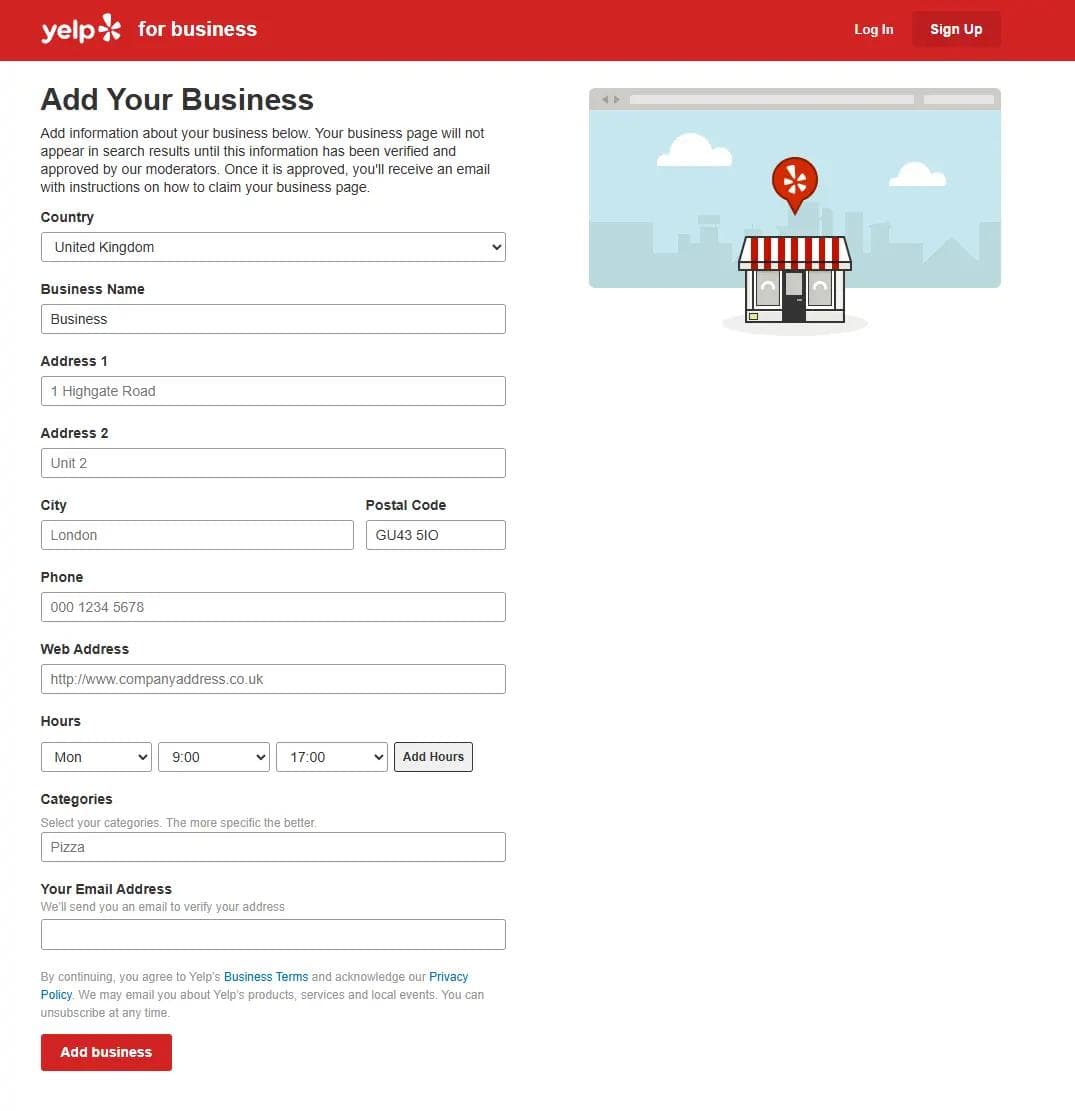
If your business wasn't already listed, you will be taken to the "Add Your Business" form. This is where you lay the foundation for your Yelp profile.
As always with local SEO, consistency is your best friend. Ensure the details you enter here match your website, your Yell profile, and your Google Business Profile exactly.
- Location & Name: Select your Country (United Kingdom) and enter your official Business Name, followed by your full Address, City, and Postal Code.
- Contact Information: Input your primary business Phone number and your Web Address. Don't skip the website link—Yelp is a highly authoritative site, and this backlink is great for your SEO!
- Opening Hours: Use the drop-down menus to add your operating hours. You can click "Add Hours" to include multiple days or split shifts. Accurate hours prevent customer frustration.
- Categories: Yelp relies heavily on categories to show your business to the right searchers. Type in your primary service (e.g., "Plumber," "Pizza," or "Hair Salon"). As Yelp notes, the more specific you can be, the better.
- Email Address: Enter a valid email address. Ideally, this should be a professional email linked to your business domain. Yelp will use this to send you important verification instructions.
Once you have double-checked that all your information is perfectly accurate, click the red Add business button at the bottom of the form.
Note: Yelp mentions that your page won't appear in search results immediately. It must first be verified and approved by their moderators.
Wait for Approval and Verify Your Identity
Unlike some other directories, your new Yelp page will not go live the second you hit submit. Because Yelp is a highly trusted platform, they use real human moderators to review new submissions to ensure they are legitimate businesses and not spam.
Here is what to expect during this verification phase:
- The Waiting Game: Yelp’s moderators typically take about 1 to 2 days to evaluate your submission. They check the details you provided against public records and other directories (like your website or your Google Business Profile) to ensure everything matches up.
- Check Your Inbox: Once your business is approved, Yelp will send an email to the address you provided in the previous step.
- Claim Your Page: Open the email and click the link inside. This link will prompt you to officially "claim" your newly approved page by setting up your Yelp for Business Owners account.
- Phone Verification: To finalize your ownership, Yelp will usually ask you to verify your identity. They will do this by making an automated phone call or sending a text message to the business phone number you provided. You will simply enter the PIN they give you on your screen.
Once that PIN is entered, Yelp will manually review your profile and notify you once it goes live.