How to Add Your Business to Nextdoor (Step-by-Step UK Guide)
In this guide
If your business relies on local customers, Nextdoor is a platform you simply cannot afford to ignore. Unlike Google or Bing, which cast a wide net, Nextdoor is entirely hyper-local. It is the modern equivalent of word-of-mouth marketing, specifically designed to connect neighbours with each other and with the businesses right on their doorstep.
In the UK, millions of people use Nextdoor to find trusted local tradespeople, cafes, shops, and services recommended by the people who live on their very street. Setting up a Nextdoor Business Page is completely free and allows you to introduce yourself to the community, respond to local requests, and build a localized reputation that drives real foot traffic and local inquiries.
Whether your business already has an unclaimed, auto-generated page waiting for you, or you need to build one entirely from scratch, this guide will show you exactly how to get your business live on Nextdoor.co.uk.
Go to Nextdoor for Business and Create an Account
To get started, you will need to head straight to the dedicated business section of the Nextdoor UK website. Open your browser and navigate to nextdoor.co.uk/create-business.
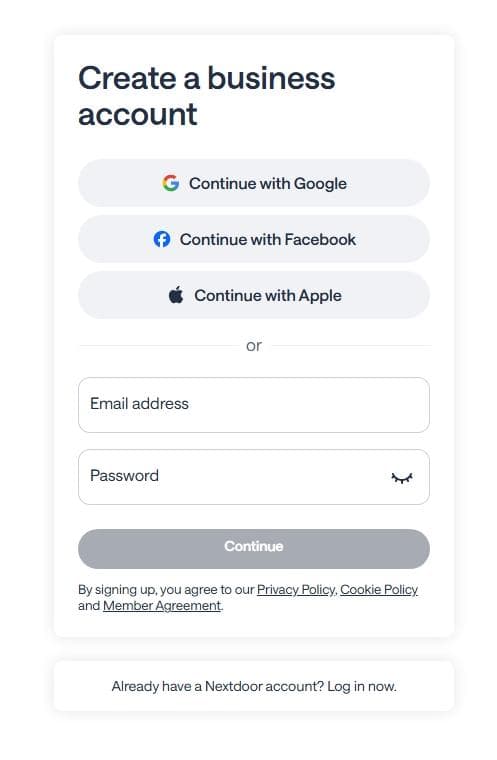
Once you are on the page, you will be prompted to log in or sign up. You have two main ways to proceed here:
- Use an Existing Personal Account (Recommended): If you already use Nextdoor personally to keep up with your own neighbourhood, you can log in using those credentials. Nextdoor actually recommends this method! It allows you to easily toggle back and forth between your personal profile and your new business page without having to remember two sets of passwords.
- Create a New Account: If you are brand new to Nextdoor, or if you prefer to keep things completely separate by using a dedicated work email address, click the option to sign up and create a new account from scratch.
Pro Tip: If you choose to link your business page to your personal account, don't worry about privacy. Nextdoor keeps them completely separate on the front end. Your neighbours will not be able to see that your personal profile is linked to the business page, and your personal posts won't appear on your business feed.
Fill Out Your Business Details
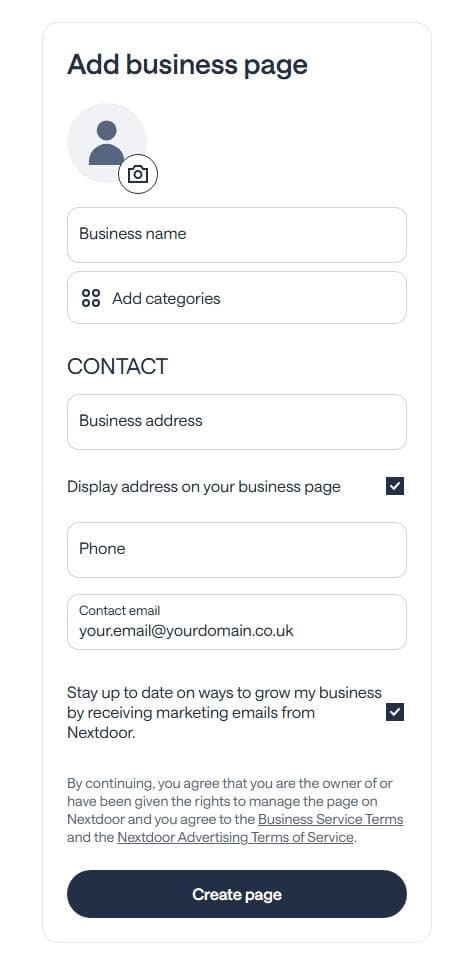
Once you have logged in or created your account, you will be taken to the "Add business page" form. This is where you will provide the core information that your local neighbours will see when they find you on Nextdoor.
Work your way through the following fields:
- Profile Photo: Click the camera icon at the top to upload your business logo or a professional headshot. A clear, recognizable image helps build trust immediately.
- Business name: Enter the official name of your business as it is known to your customers.
- Add categories: Search for and select the categories that best describe your services or products. This helps Nextdoor show your business when locals search for specific needs (like "Electrician" or "Dog Walker").
- Business address: Enter your primary business location. Nextdoor uses this to place you in the correct local neighbourhood.
- Display address on your business page (Checkbox): This is checked by default, but you can untick it if you need to.
Pro Tip for Service Area Businesses: If you work from home or travel to your customers (like a mobile hairdresser or a plumber), you can simply uncheck this box. Nextdoor will still use your address to verify your local neighbourhood, but your exact street address will be hidden from the public.
- Phone & Contact email: Provide the best phone number and email address for customers to reach you.
- Marketing emails (Checkbox): Decide if you want to receive promotional emails from Nextdoor and check or uncheck this box accordingly.
Once everything is filled out accurately, review the terms of service at the bottom and click the dark blue Create page button.
Verify Your Business with Documentation
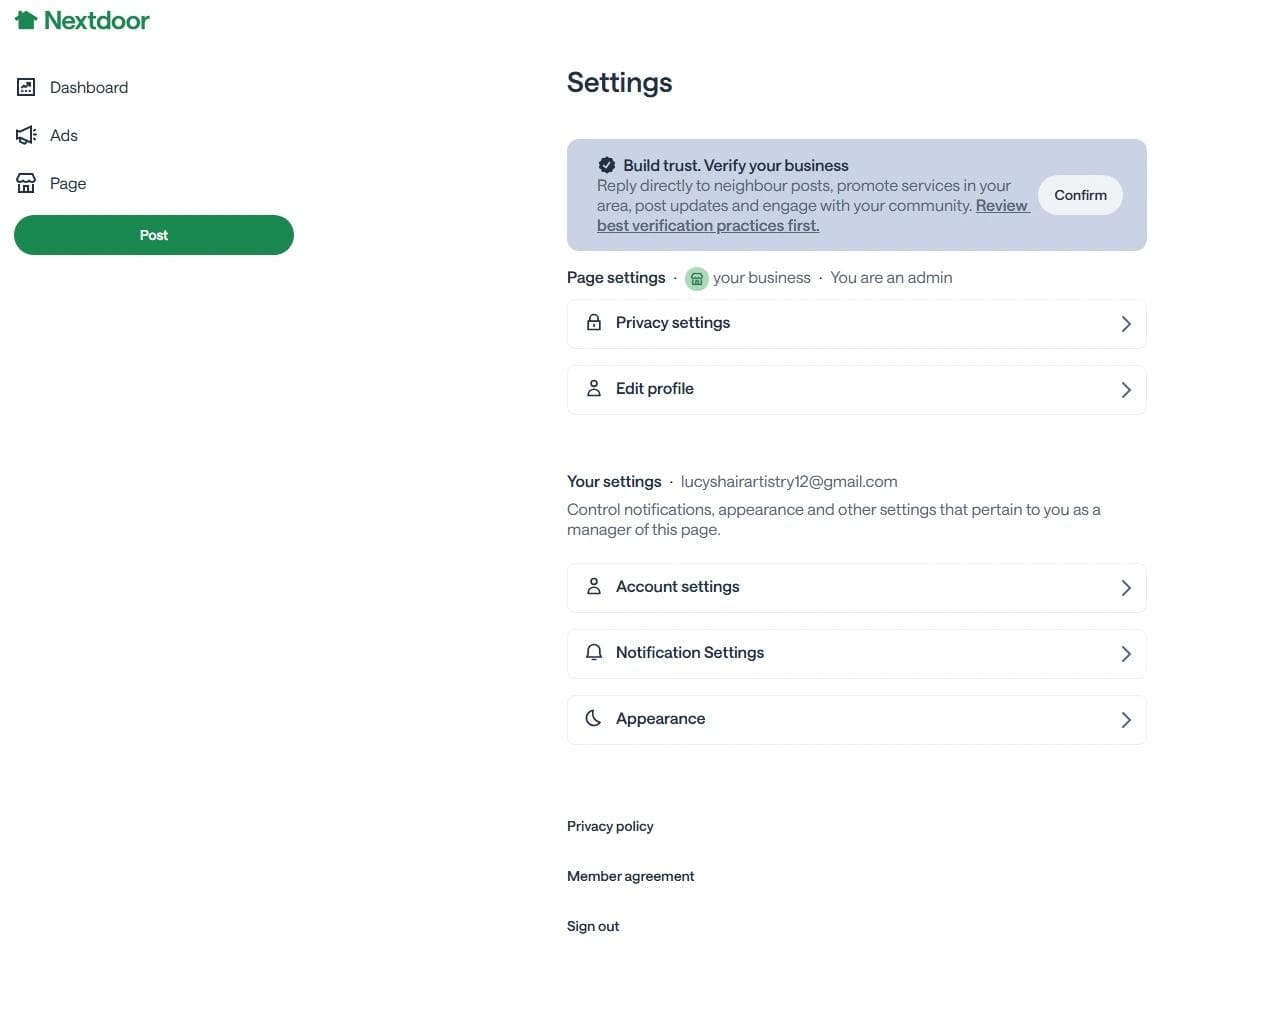
After creating your page, you will be taken to your new Nextdoor business dashboard. You will likely land on a "Create Campaign" page, and you might even see a popup prompting you to verify your account (as seen in the screenshot above).
Before you start worrying about ads or campaigns, your absolute first priority should be getting your business verified. Nextdoor requires this step to maintain trust within the local community before you can start posting or interacting with neighbours.
Here is how to complete the verification process:
- Navigate to Settings: Ignore the campaign setup for now. Look to the bottom left corner of your dashboard and click the Settings button. (Alternatively, if you see the "Get verified to unlock posts" popup appear immediately, you can simply click the Confirm button right there).
- Start the Process: At the top of your settings page, look for the section titled "Build trust. Verify your business" and click the Confirm button.
- Upload Your Documents: Nextdoor will walk you through a few prompts asking you to upload official documentation that proves your business is legitimate and operating at the address you provided.
What You Will Need to Prepare: To ensure a smooth verification process, have digital copies or clear photos of your official business documents ready to upload. Acceptable documents include:
- Bank statements
- Business licenses
- Business registration certificates
- Certificates of Good Standing
- Certificates of Incorporation
- Certificates of VAT Number
- Company tax returns
- Business name registrations
- Doing Business As (DBA) statements
Once you submit your documents, Nextdoor's team will review them. As soon as you are approved, your page will be fully unlocked, and you can start posting updates, offering local deals, and building relationships with your neighbours!